Inspection Properties
Inspection Properties are custom fields that appear in the user interface’s Inspection modal. They are set by the Admin user in the Account Admin . Inspection Properties are created to provide users responsible for handling the quality release of products with the option to enrich data with more specific information relating to quality inspection. Once enabled, Inspection Properties are available in the Inspection Modal for the user in which they can enter all the relevant information with regards to the product release. Note, all enabled inspection properties will be displayed in the Shipment Inspection Modal.
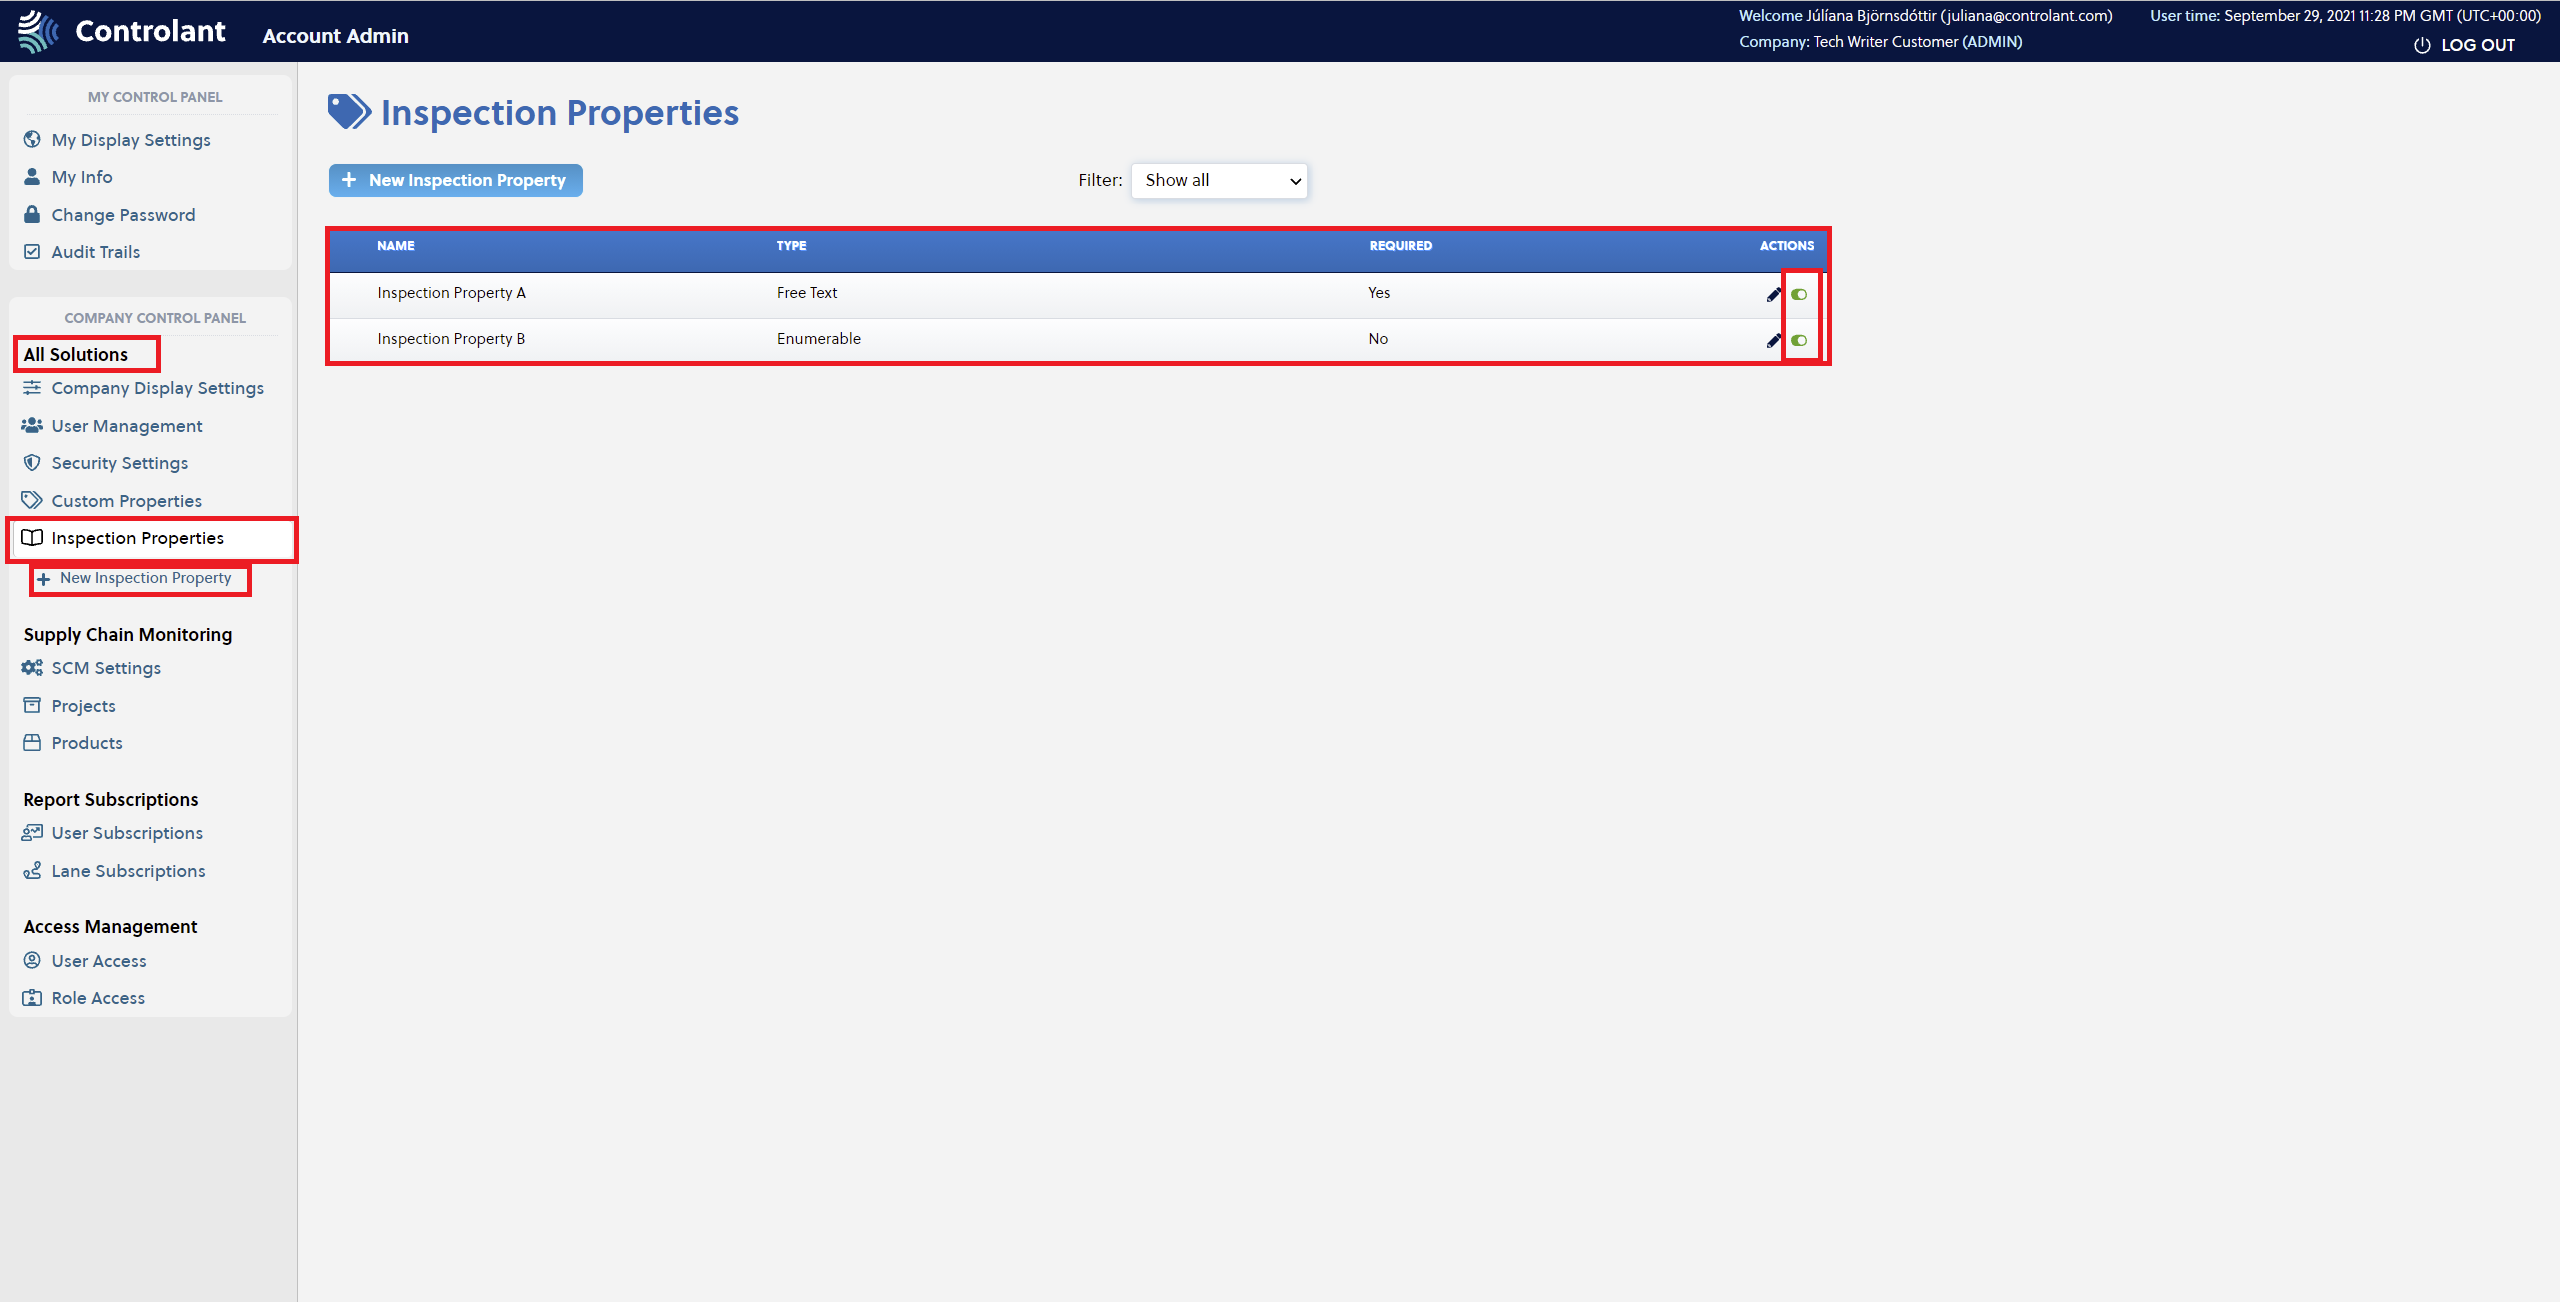
The Admin user selects Inspection Properties under All Solutions and can create new inspection properties in the New Inspection Property window. Once created, a list of already created Inspection Properties is displayed when the Inspection Properties option is selected.
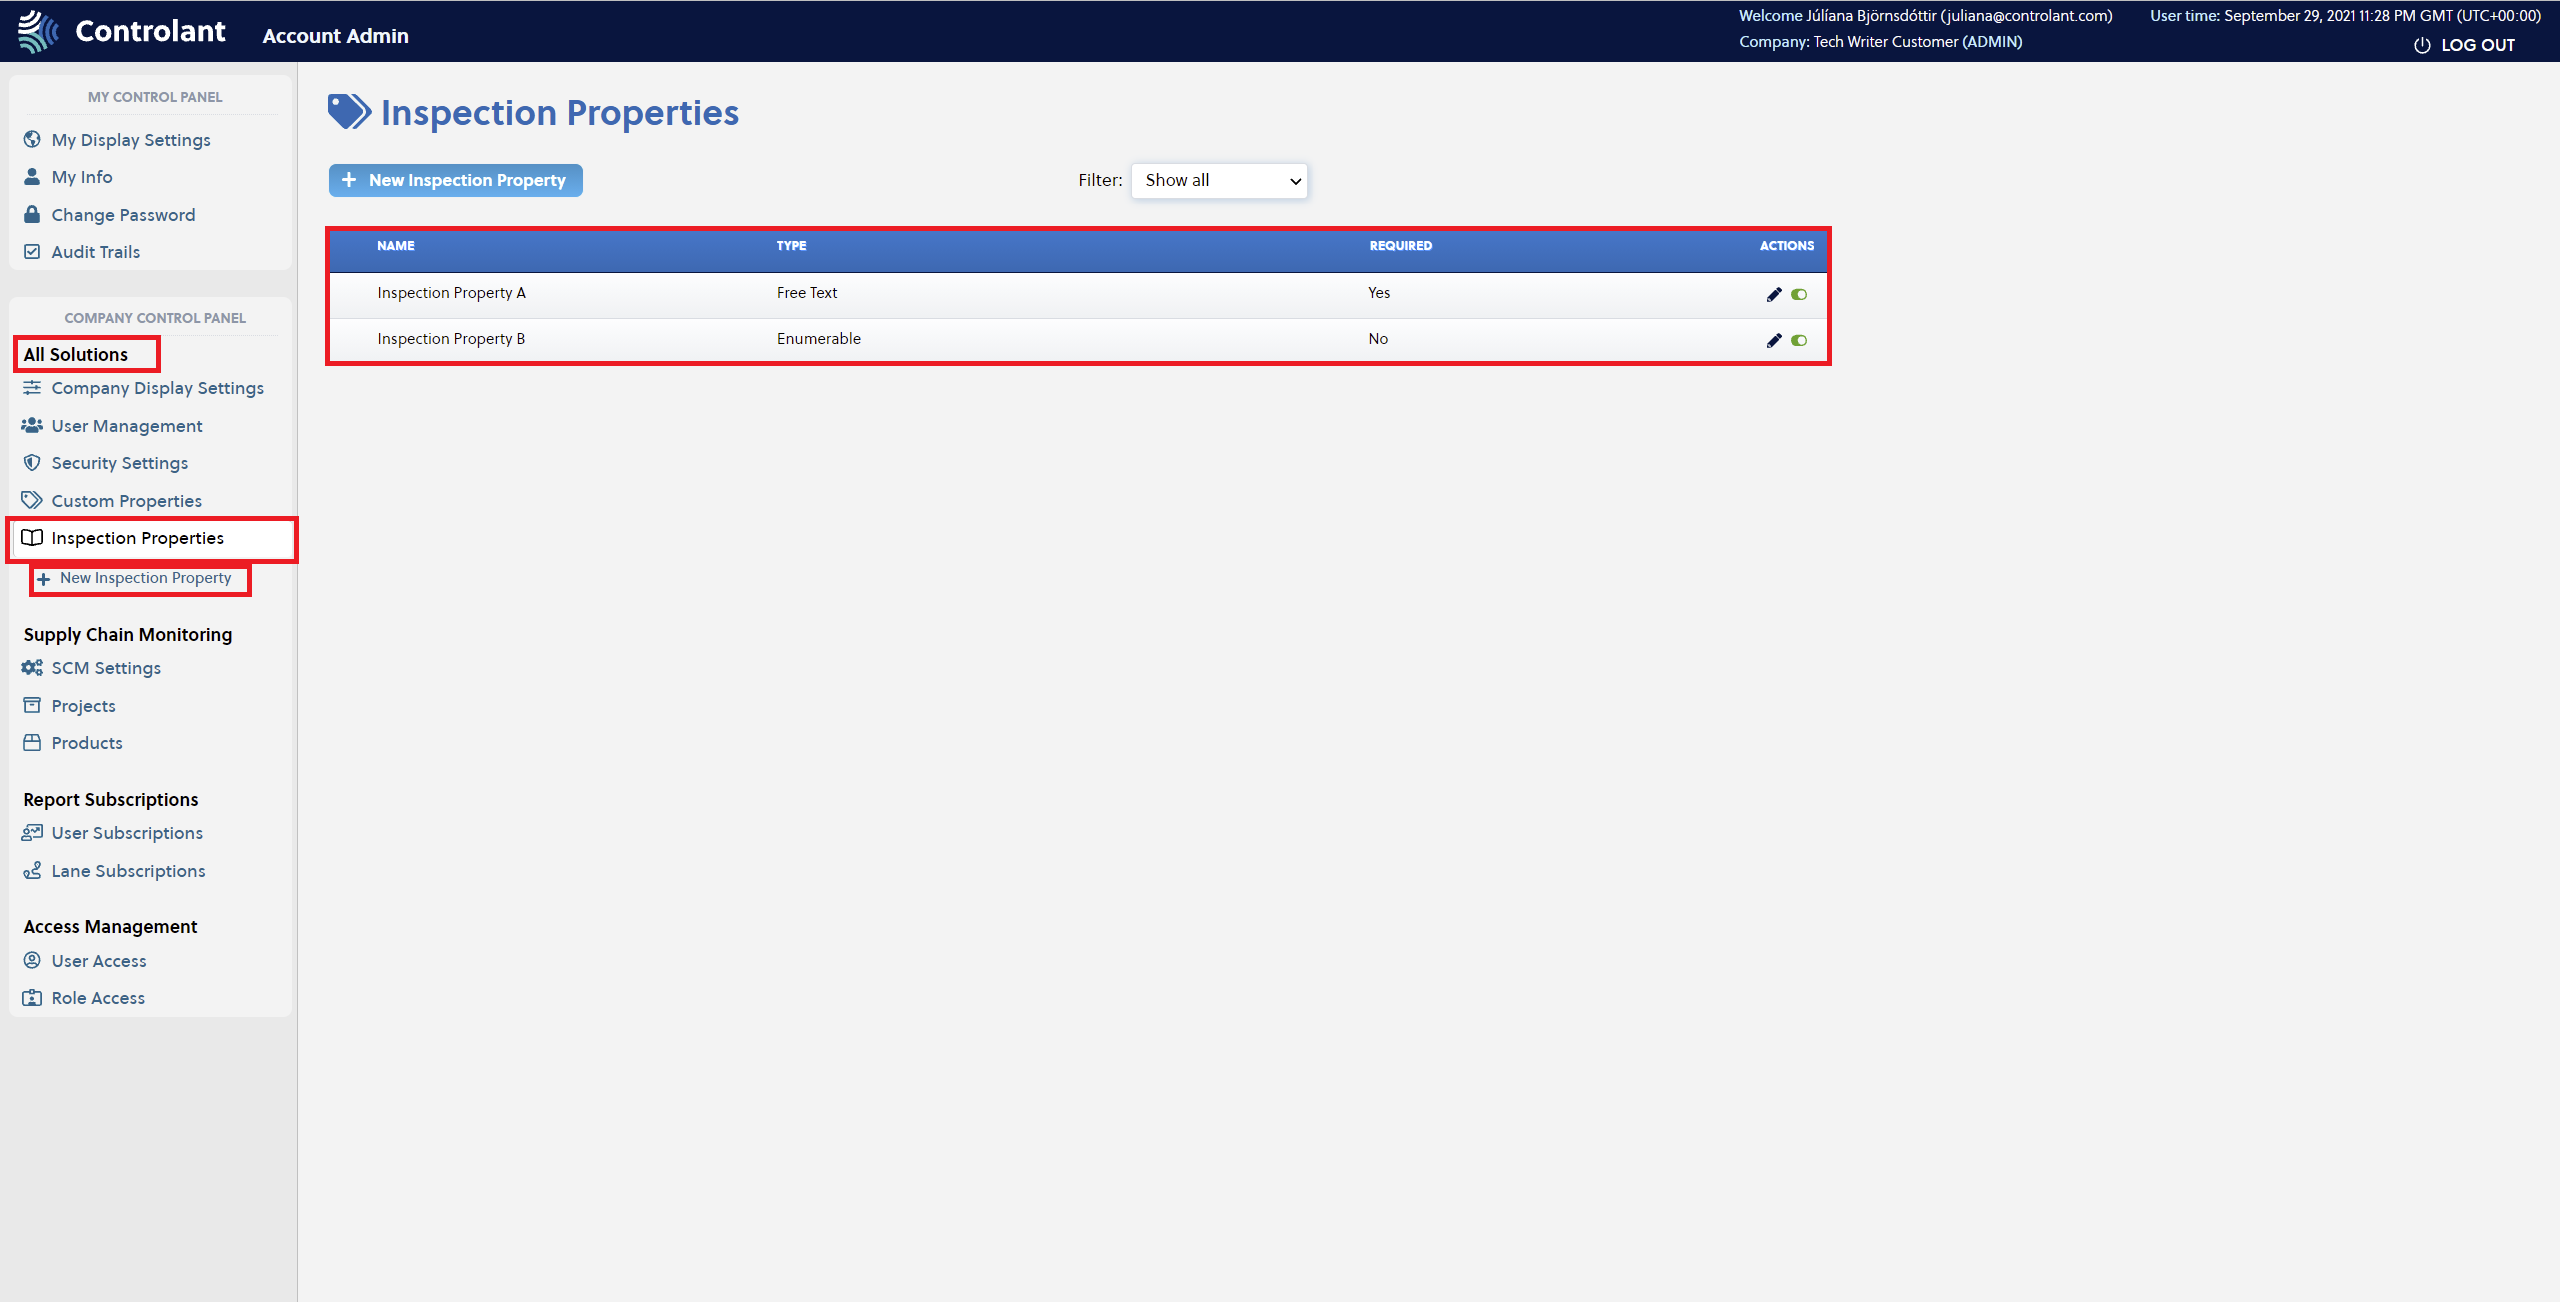 |
The view can be filtered with the following options:
Show all
Enabled only
Disabled only
Required only
Enumerable only
Free Text only
Create New Inspection Property
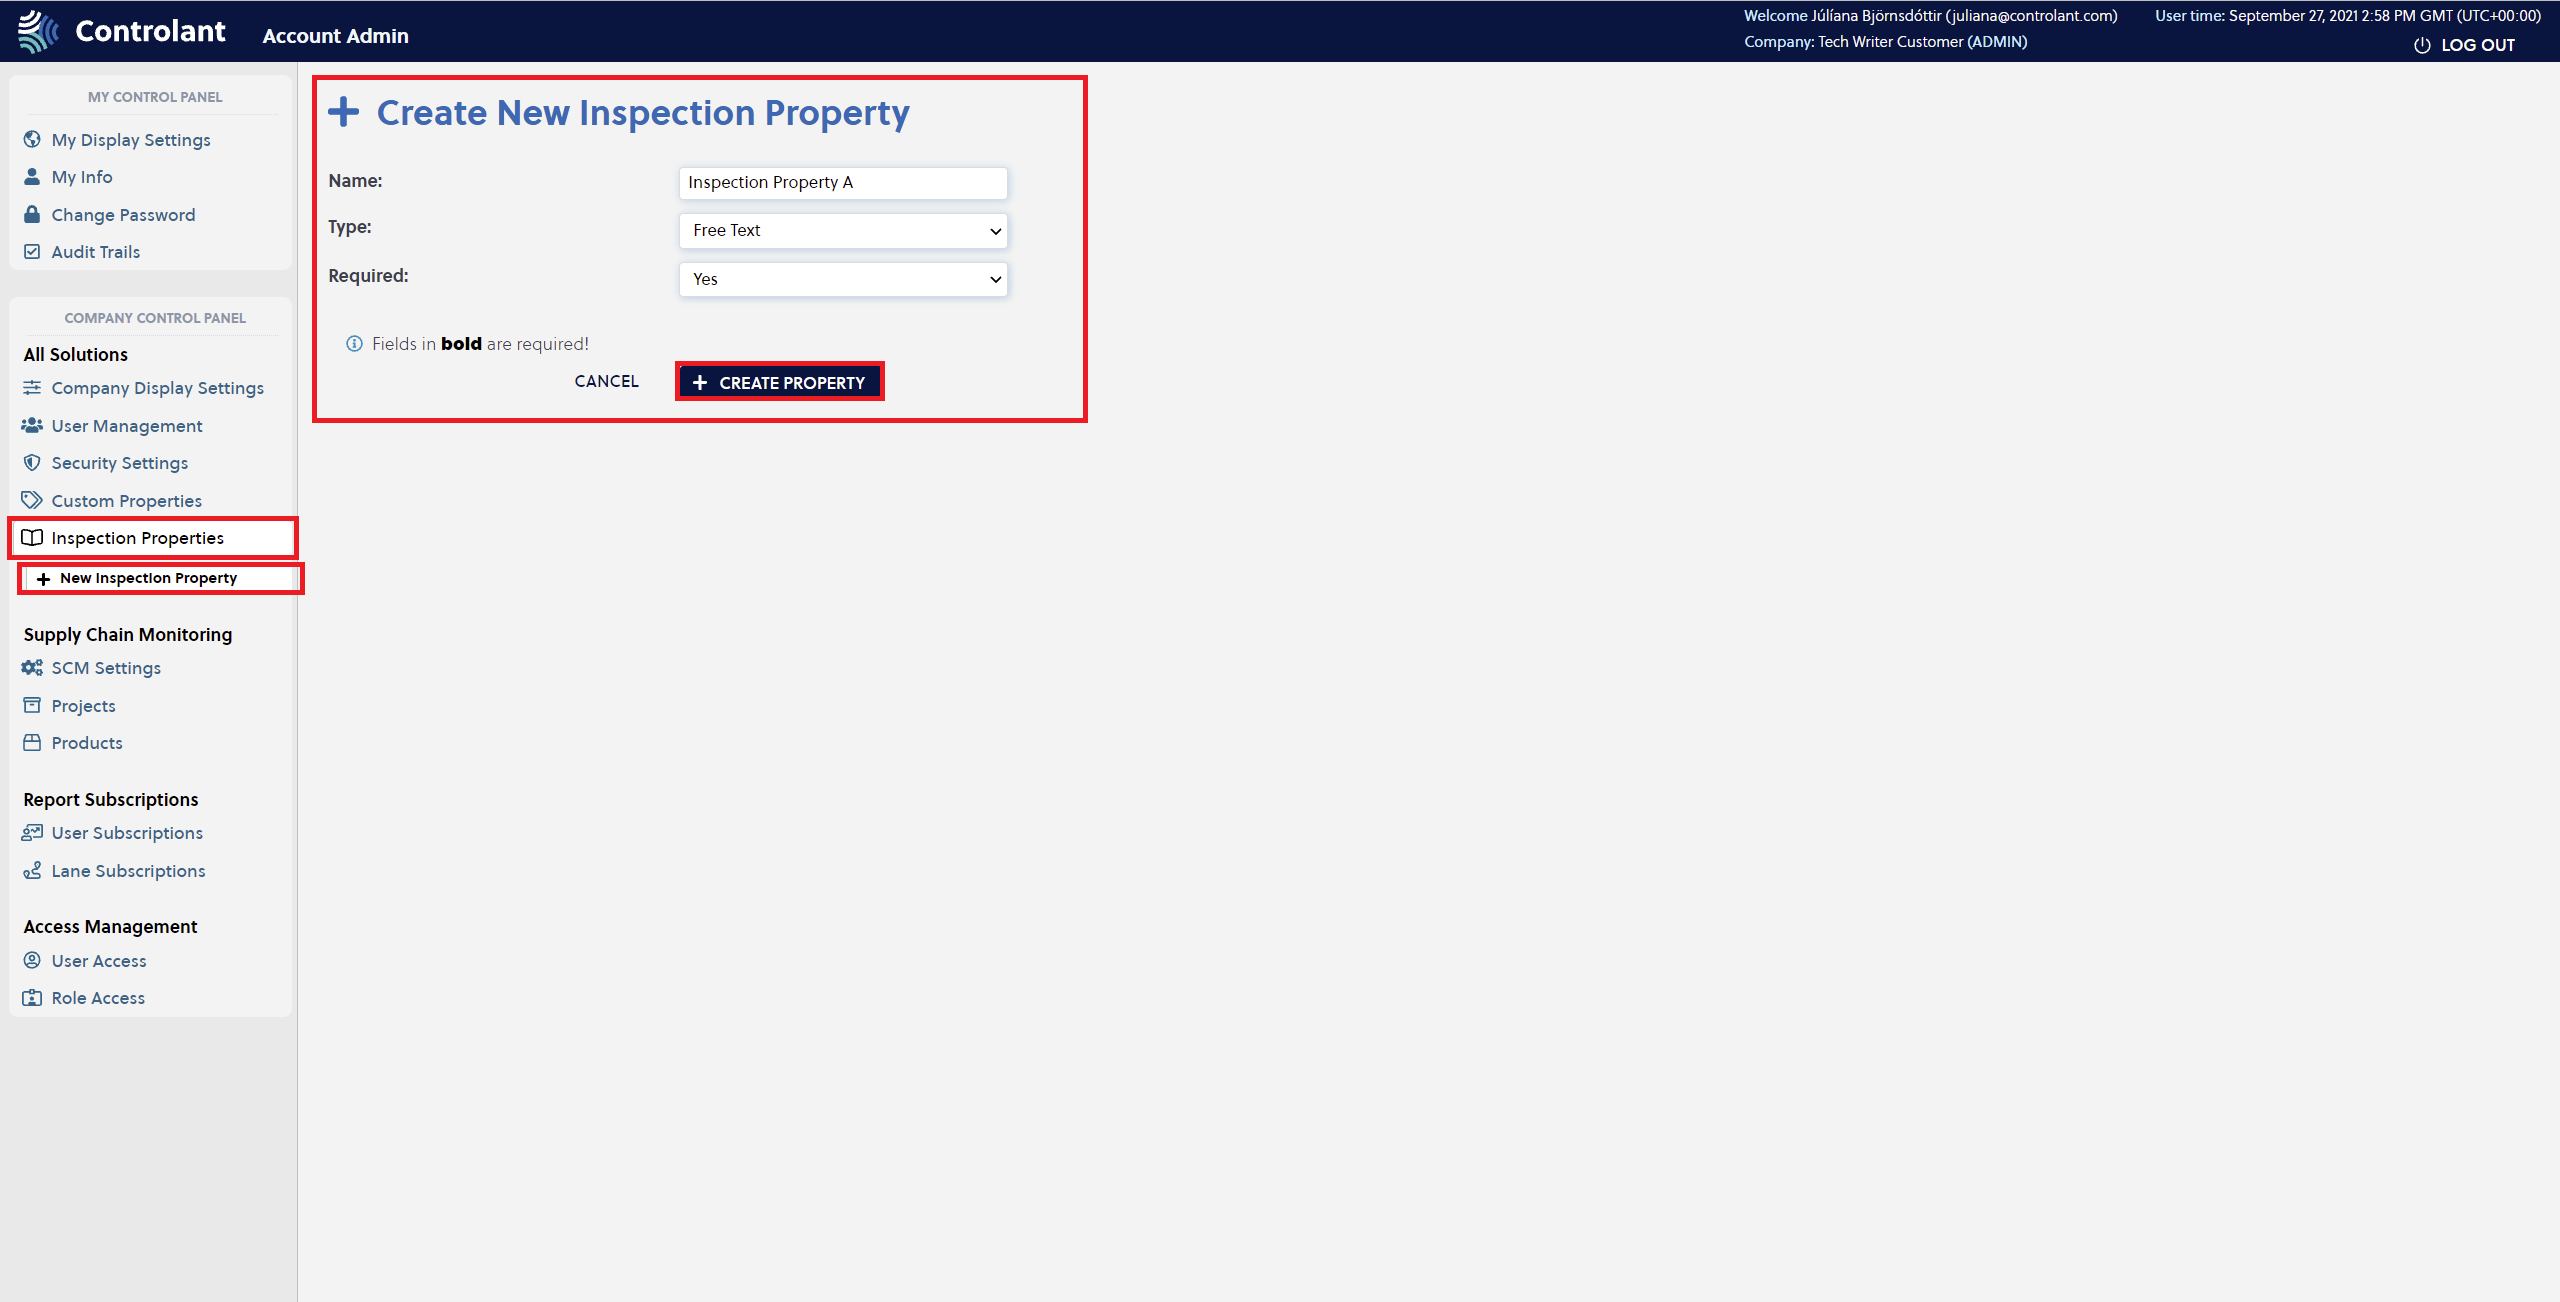
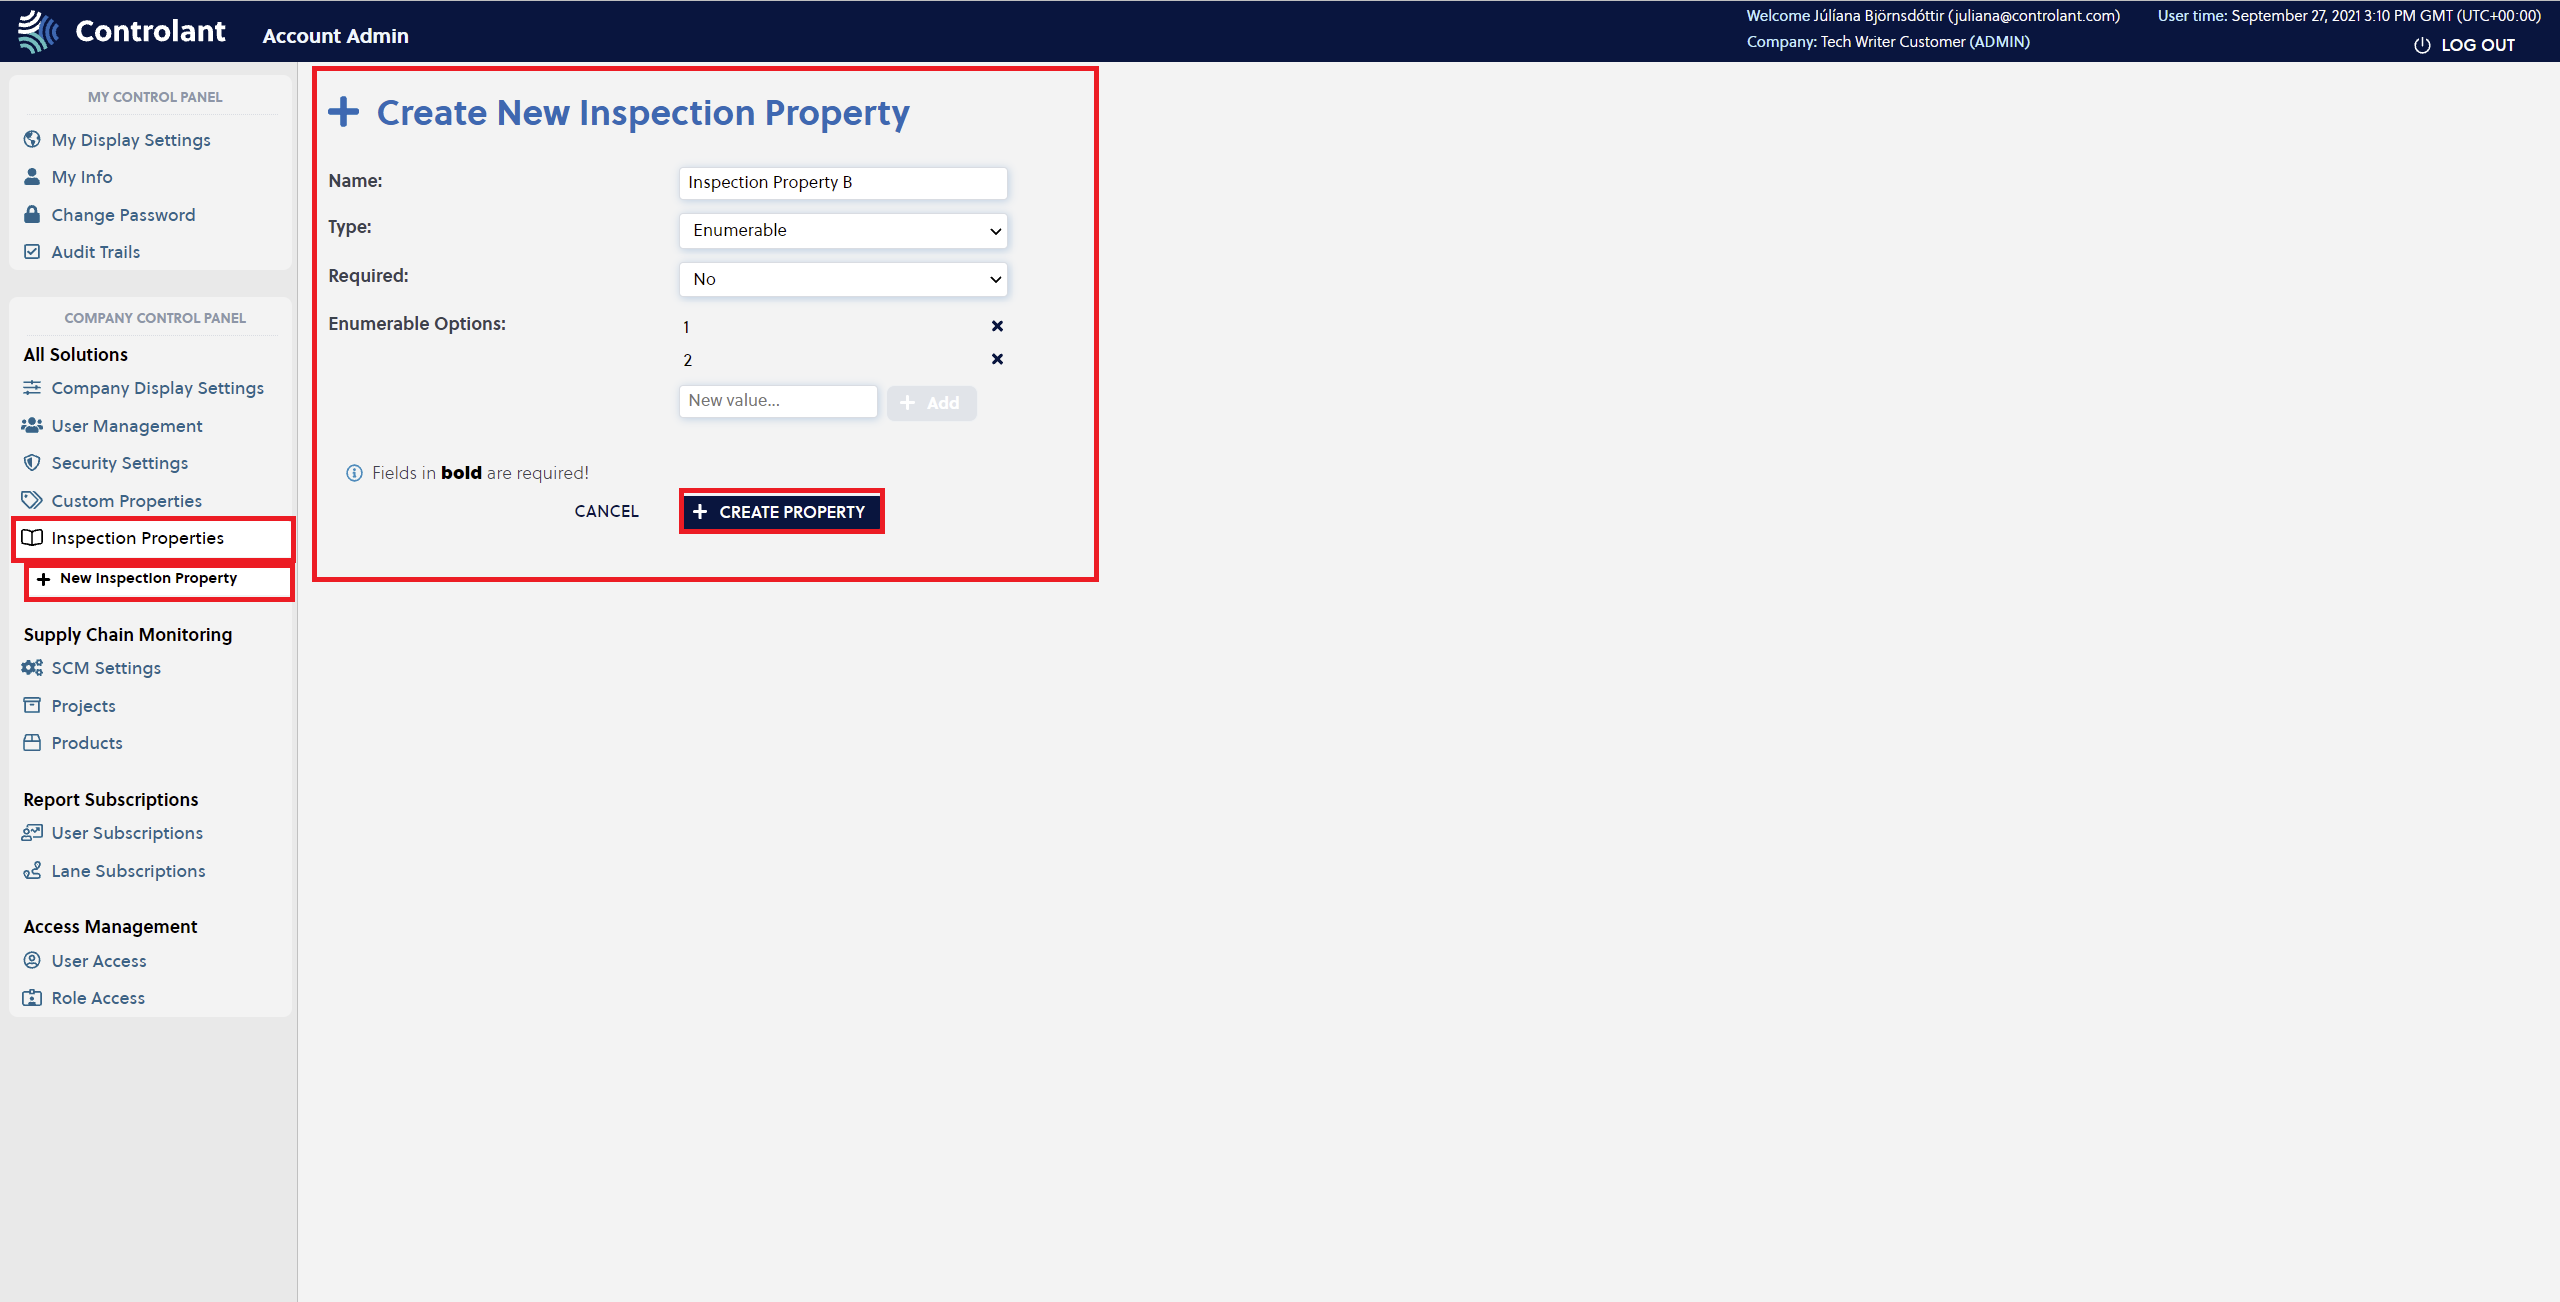
To create a new Inspection Property, the Admin user must press the New Inspection Property button to confirm the selection.
User must populate the following fields.
Name: The name of the property as presented to the user in the SCM UI, reports, etc. The property name is restricted to 128 characters.
Type: Available types are Free Text (restricted to 1024 characters) and Enumberable (multiple selection). For Enumerable properties, the Enumberable options must be specified and the character restriction is 128.
Required: The user chooses whether or not to make the property a required field by choosing Yes or No. If a property is required, the user cannot complete shipment inspection without providing a value. If not required, the field is displayed but is optional.
 |
 |
 |
Only Admin users have access to this settings in the user interface for the Admin account.
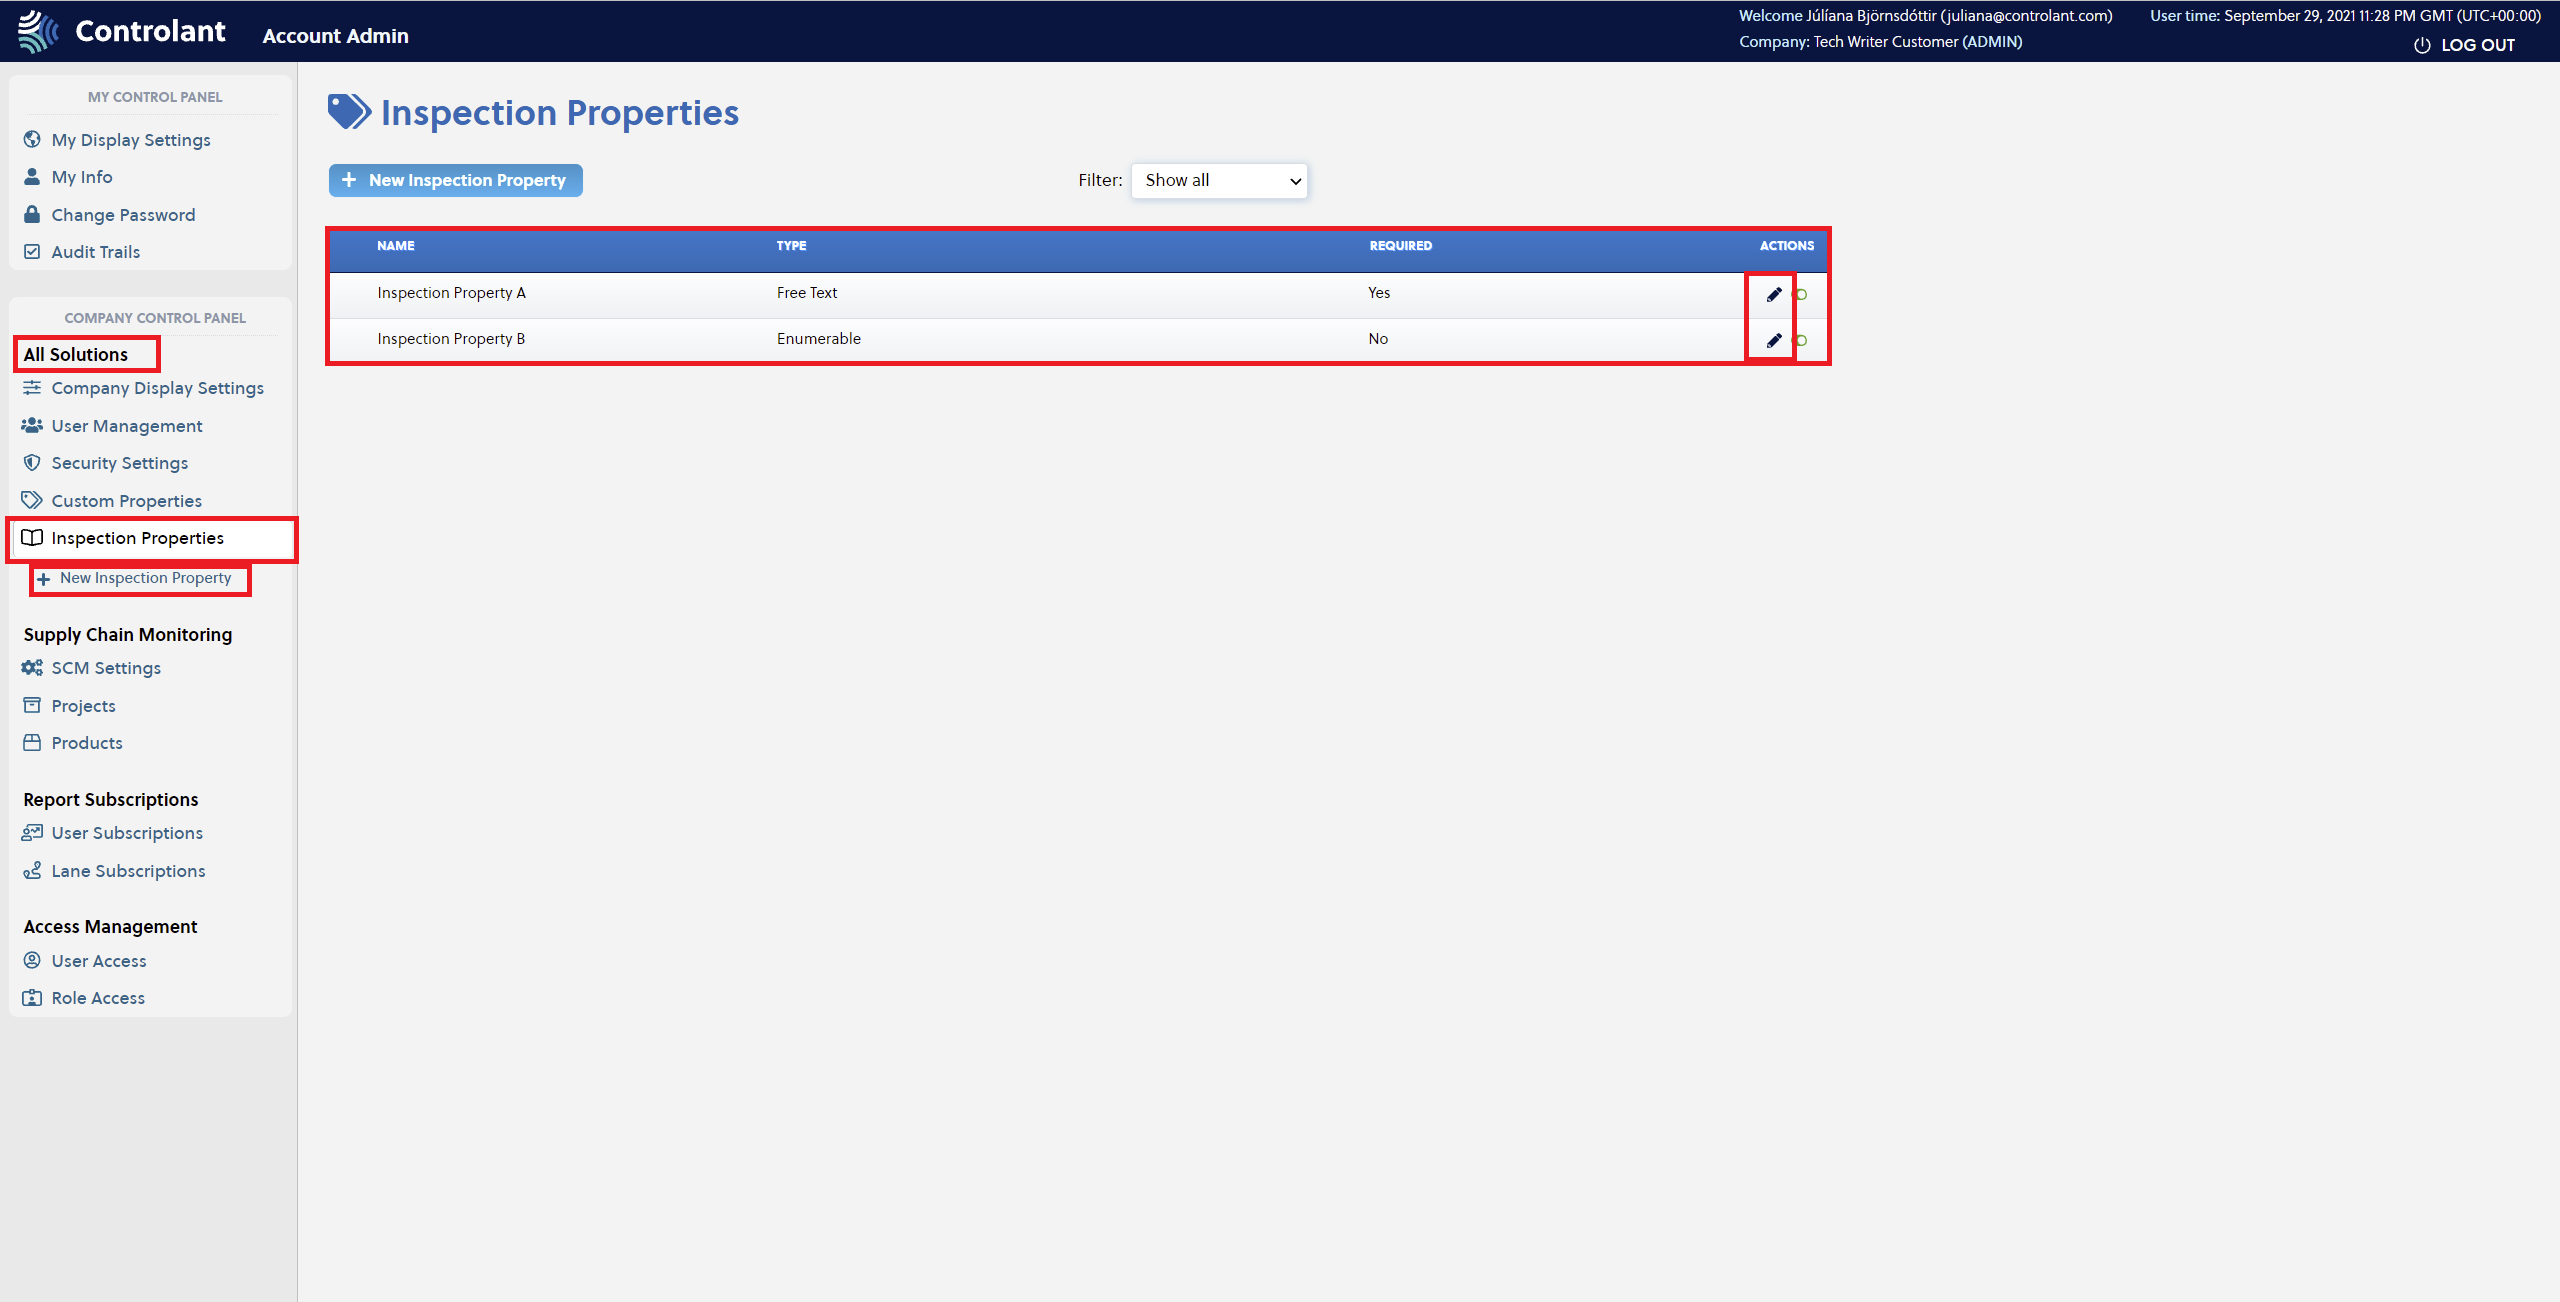
Editing Inspection Properties
Inspection properties are edited by selecting the Edit icon under Actions, as displayed on the image below.
 |
The user is taken to the Edit Inspection Property window where the appropriate changes are made. To confirm the changes, press the Save Changes button.
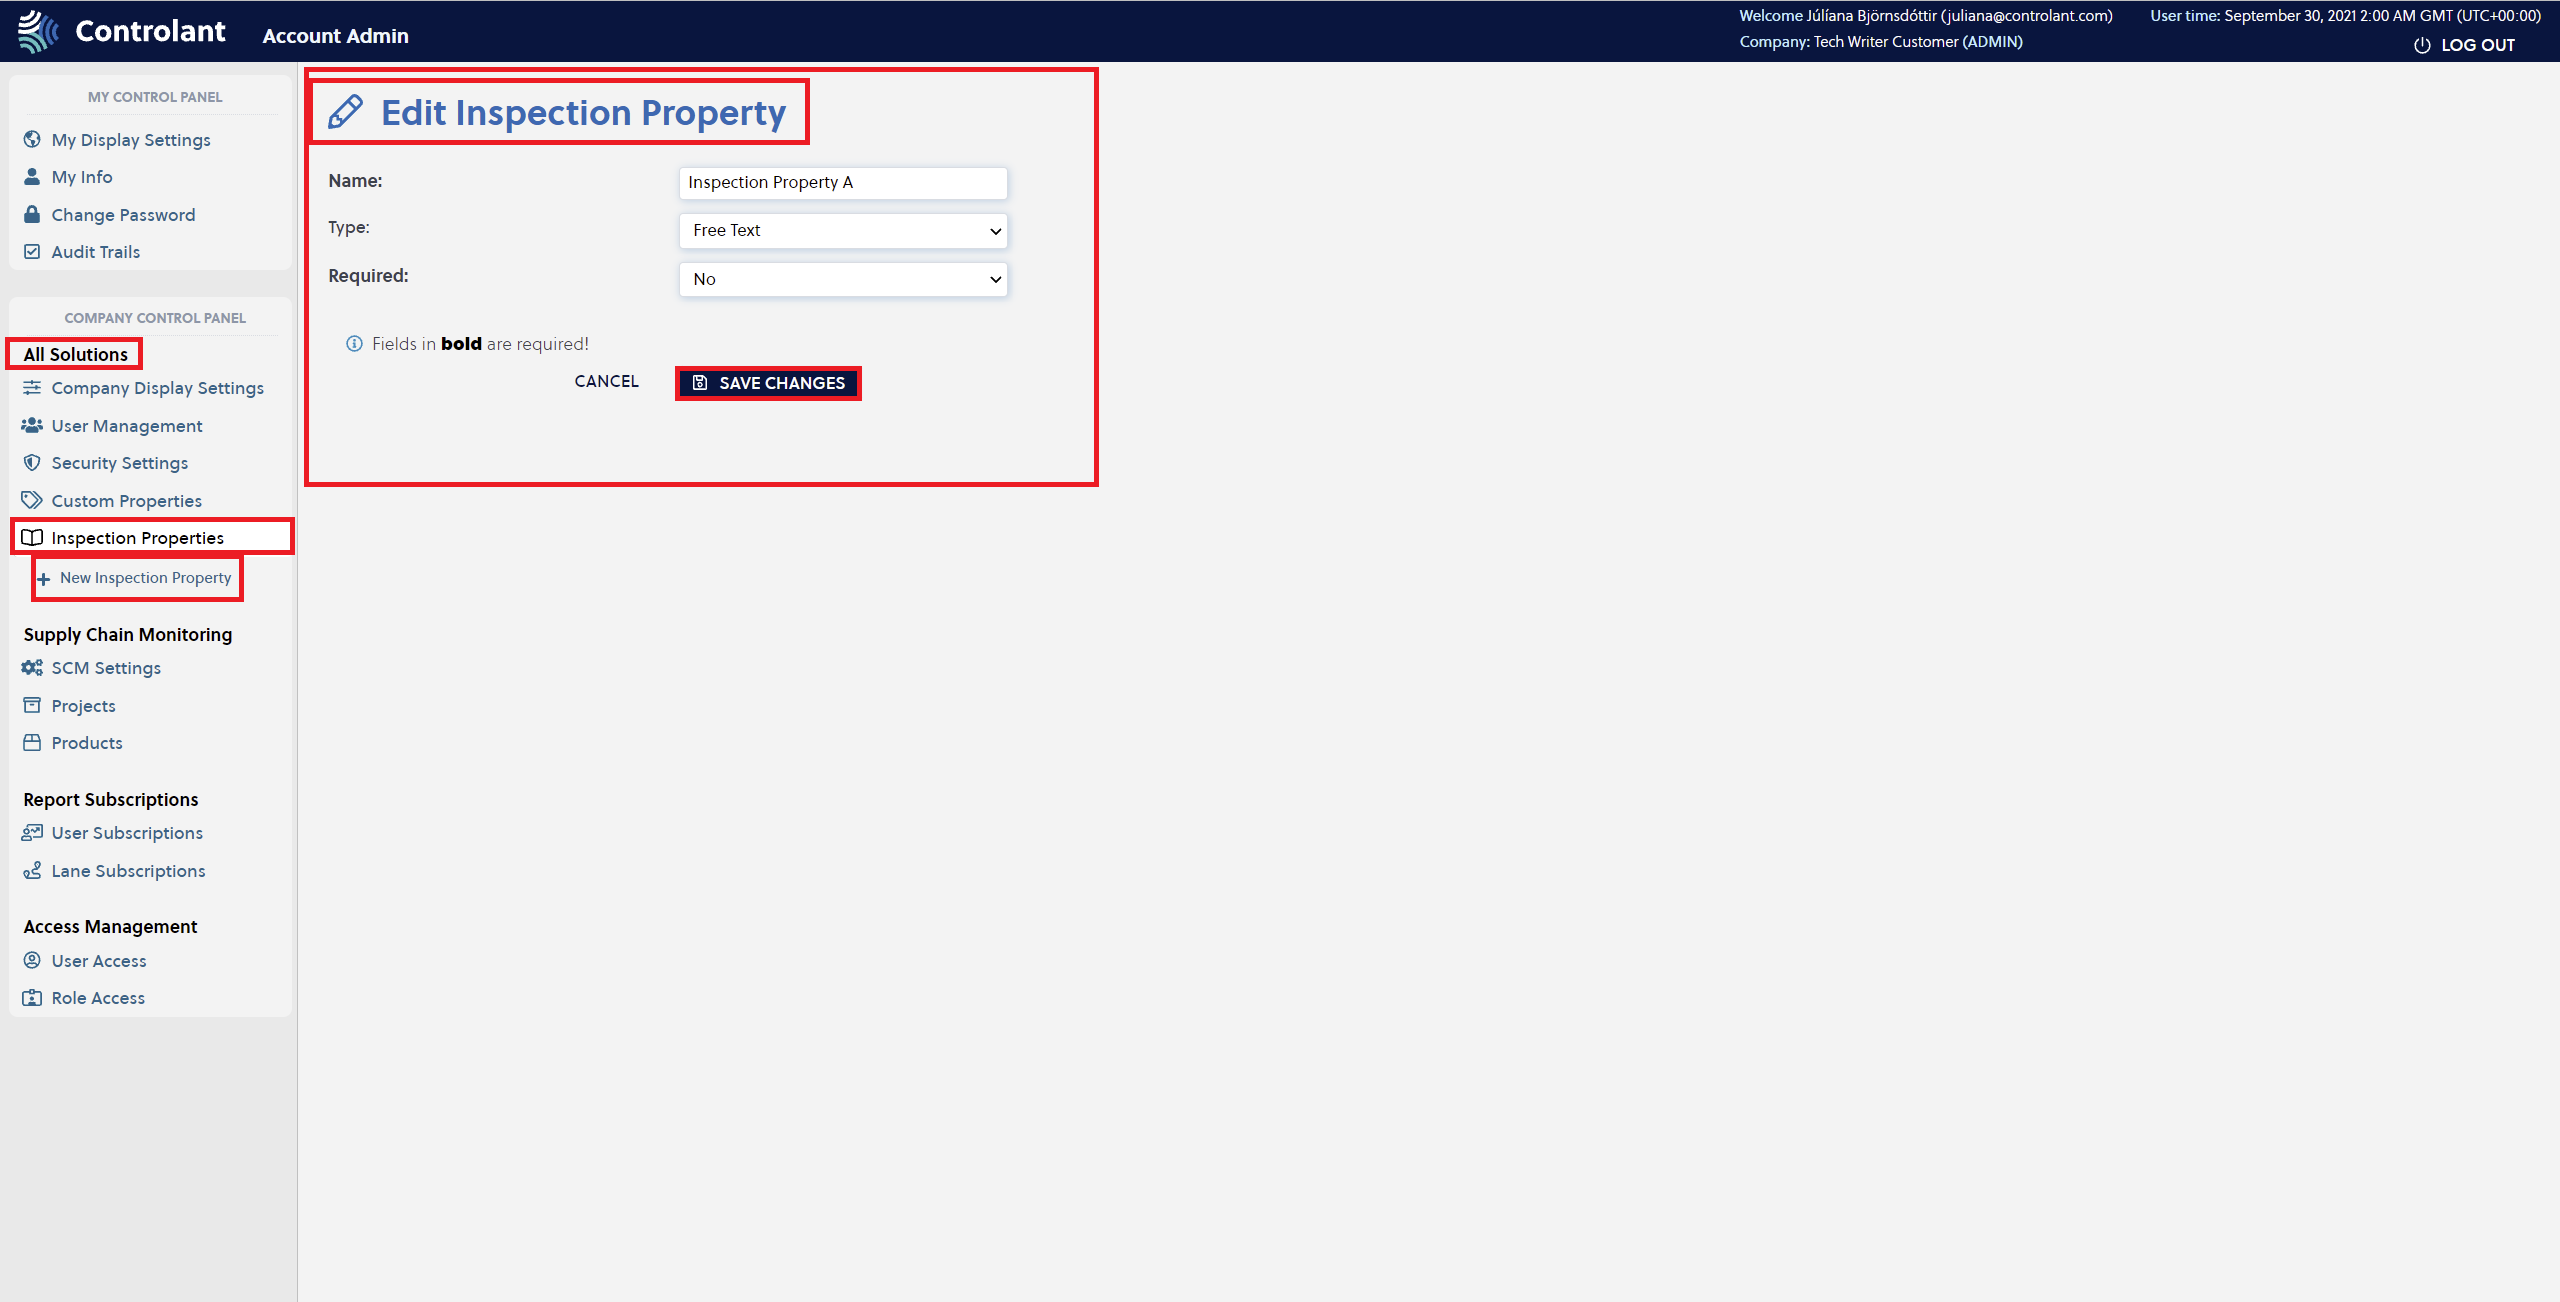 |
Edits to existing inspection properties propagate to the SCM UI. The user can change the Name, Type, and the Required field. By pressing the Cancel button, all the changes made do not take effect and the previous setting applies.
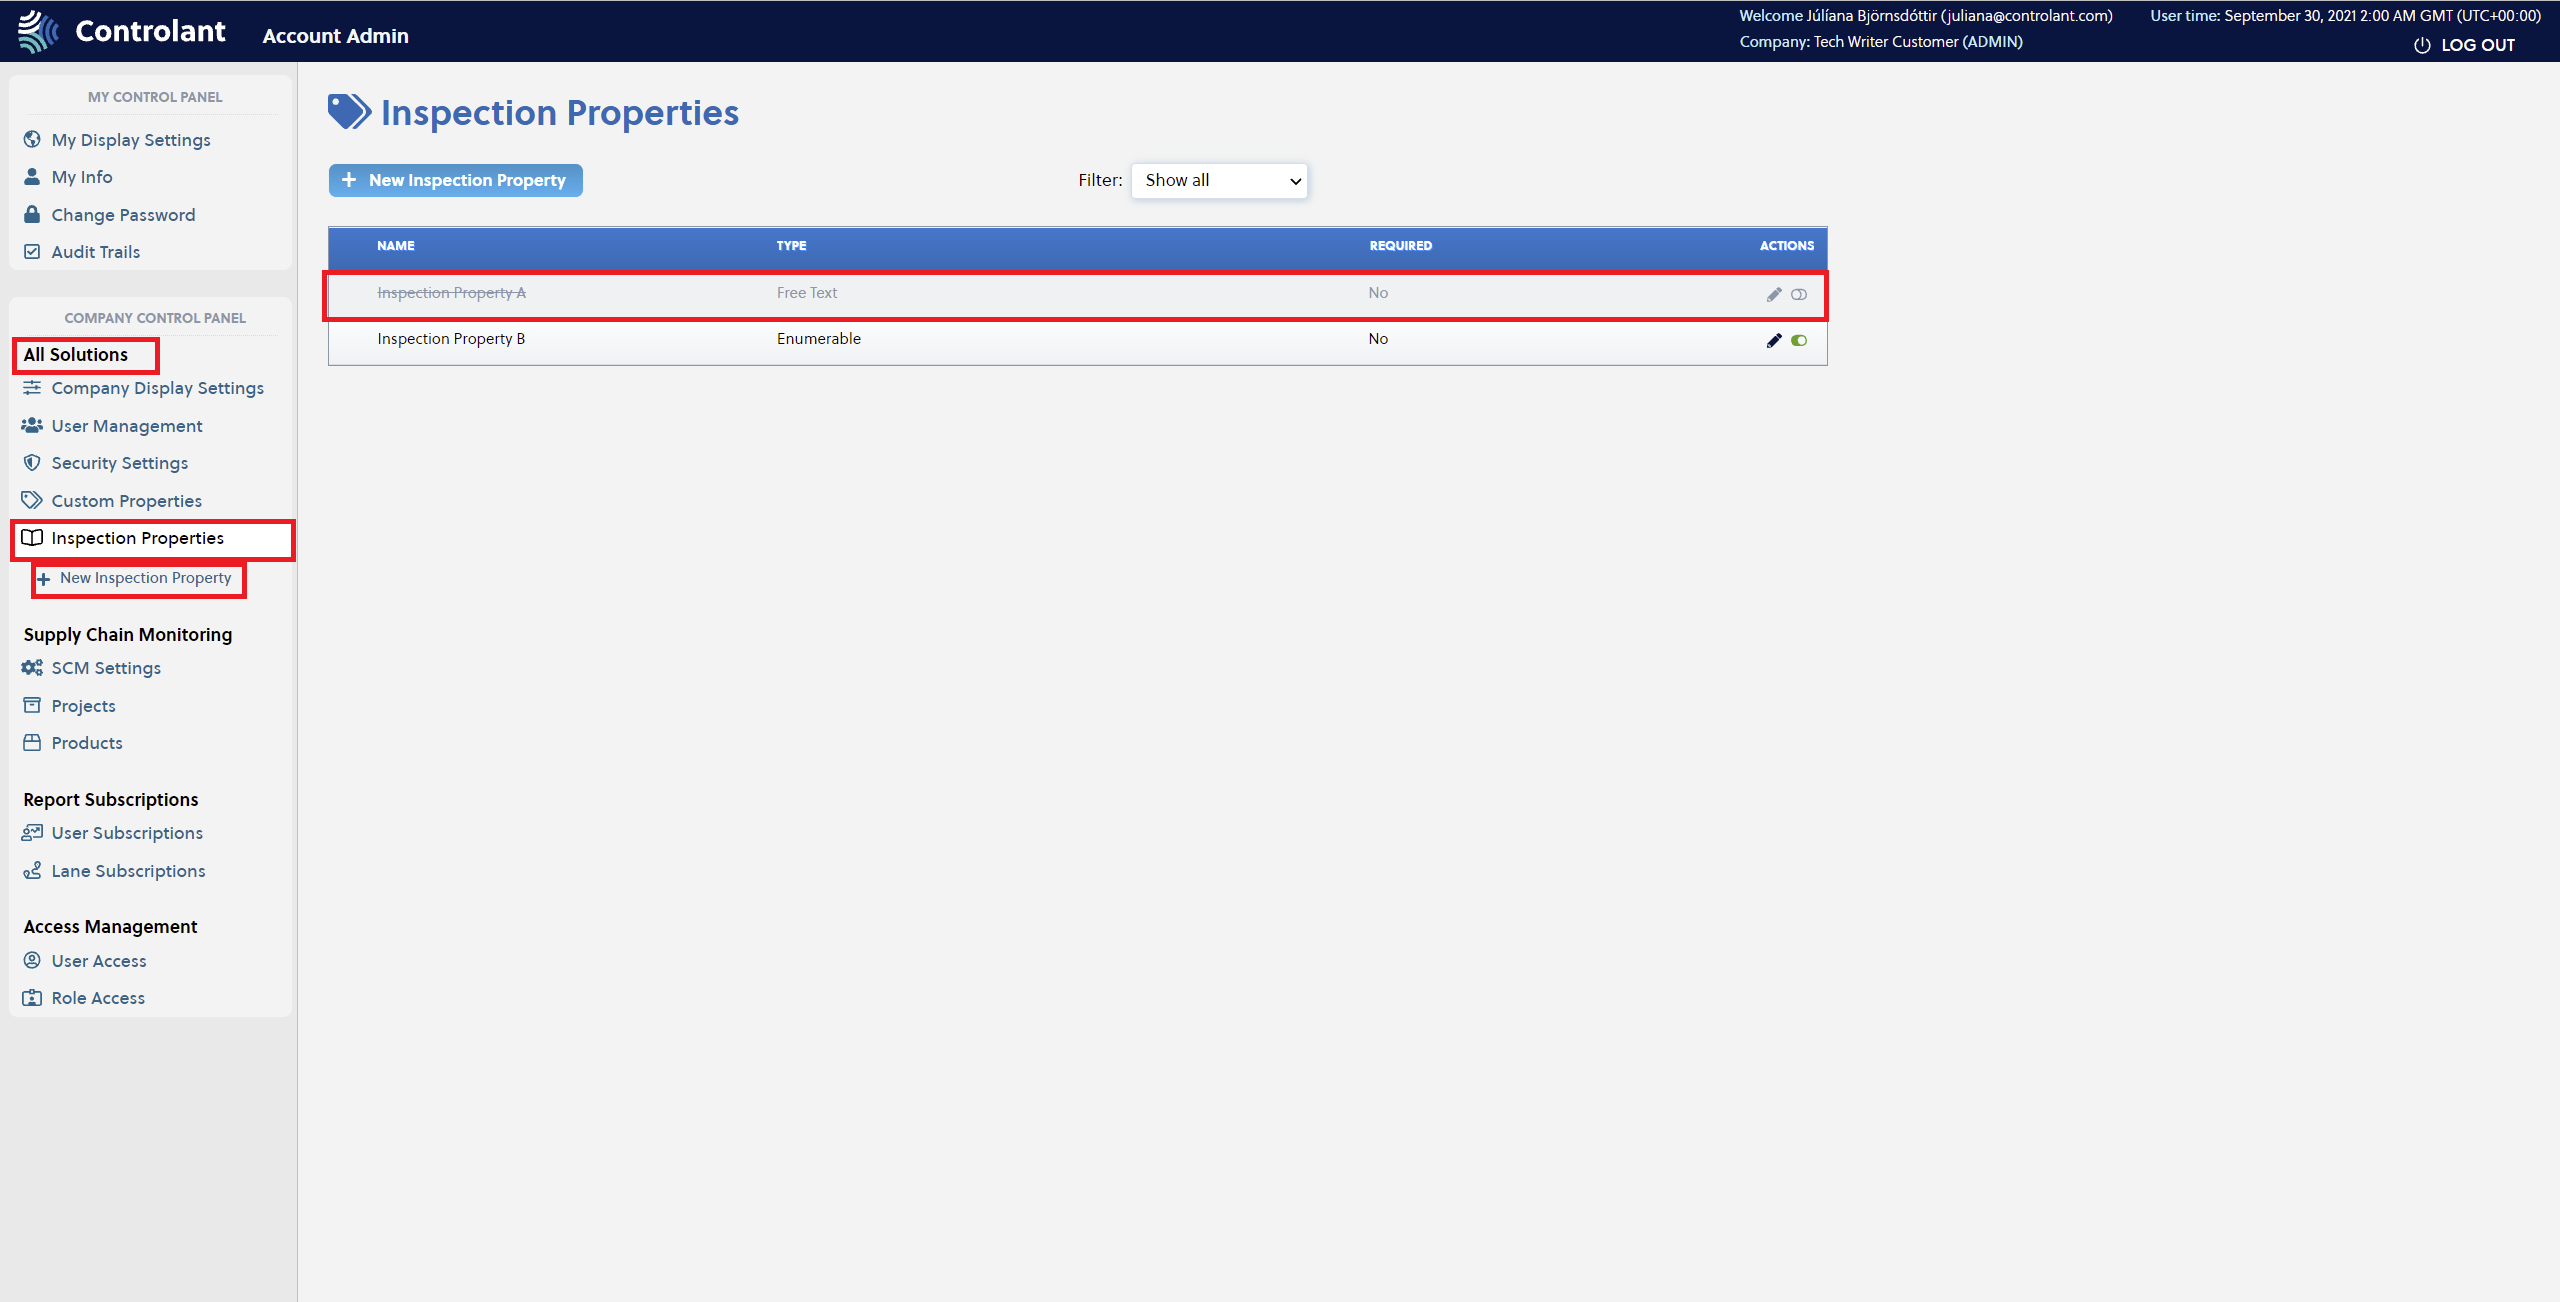
Disabling Inspection Properties
Inspection Property is disabled by clicking on the Disable icon.
 |
By disabling a property, the option disappears from from the Inspection modal (including closed shipments) in the SCM UI, but any selected value will remain in the Properties tab in the SCM UI. A disabled Inspection Property is greyed out as shown below.
 |